


 Direct purchase from the factory

![[US DIRECT] ATOMSTACK A5 M50 APP Control Dual-Laser Laser Engraving Cutting Machine Laser Engraver Cutter 5.5W Output Power Fixed-Focus 304 Mirror Stainless Steel Engraving DIY Laser Marking for Metal Wood Leather Vinyl](https://static.roymall.com/d/file/mall/titlepic/235/67803406-41f3-499a-afb7-154990584ff8.jpg?x-oss-process=image/resize,w_237/quality,Q_80/format,webp)


![[EU/US Direct]Raiser for LONGER RAY5 Engraver](https://static.roymall.com/d/file/mall/bigpic/235/65e9b76d-574a-4b4b-9c6c-02db18b89460.jpg?x-oss-process=image/resize,w_237/quality,Q_80/format,webp)
![[US/UK Direct] Refurbished ULTIMEA Nova S70 3.1.2 Soundbar 390W True Dolby Atmos Soundbar BassMax 4K Dolby Vision HDR Passthrough 3EQ Modes Wired Speaker Subwoofer](https://static.roymall.com/d/file/mall/titlepic/235/e1440062-c78c-4565-8aa7-f8857d749771.jpg?x-oss-process=image/resize,w_237/quality,Q_80/format,webp)


1.You can contact the customer service. for any question regarding the product.
2.Ask the question in English to get answer faster.
3.Keep your question short and to the point.
Questions:0/2000

 Multi Rotor PartsFPV SystemRadios & ReceiverBattery & ChargerTools & Bags & StorageConnector & Cable & WireRC ServosElectronic Learning ToysPlane & Parachute ToysSolar Powered ToysPottery Clay & ToolsPaper Art & DrawingBlocks & Track ToysModel BuildingDiecasts & Model ToysProtective GearsMotorcycle LightsCharger & Socket AdapterMotorcycle Engines & ComponentMotorcycle HelmetMotorcycle DIY KitsMotorcycle AccessoriesMotorcycle Alarm & SecurityCar Stickers & DecalsCar CoversWindow FoilsCar Protective FilmCar Protective Film Body ArmorLicense Plate AccessoriesDIY Electronic KitsElectronic Accessories & SuppliesModule ComponentsBoard & ShieldExpansion Board & ShieldSmart ModuleSensor & Detector ModulePower Supply ModuleRaspberry Pi & Orange PiSecurity Alarm SystemSmart Remote ControlWeather Station & ThermometerAccess Control & IntercomsHome Automatic KitsAutomation ModulesClocksHome Decor StickerDecorative PaintingDecorative CraftsStorage BagsStorage BoxesItems Storage & OrganizationSeedsWatering & IrrigationGarden LightsPest Control ProductsBathroom ApplianceShowerhead & AccessoriesBathroom Storage & OrganisationBathroom SafetyDoor Hardware & LocksIndustrial HardwareDecorative HardwarePackaging & ShippingStorage & OrganizationFurniture HardwareKitchen Tools & GadgetsDrinkware & Tea SetsBakeware & AccessoriesHome Brewing & Wine MakingKitchen Knife & CutleryBarbecue & Picnic SuppliesDinnerware & FlatwareXiaomi Kitchen Appliance
Zaručené bezpečné platby

 Darček zdarma
 Prepravná politika
 Reklamačný poriadok,,,,,
A part of the review has been auto-translated.
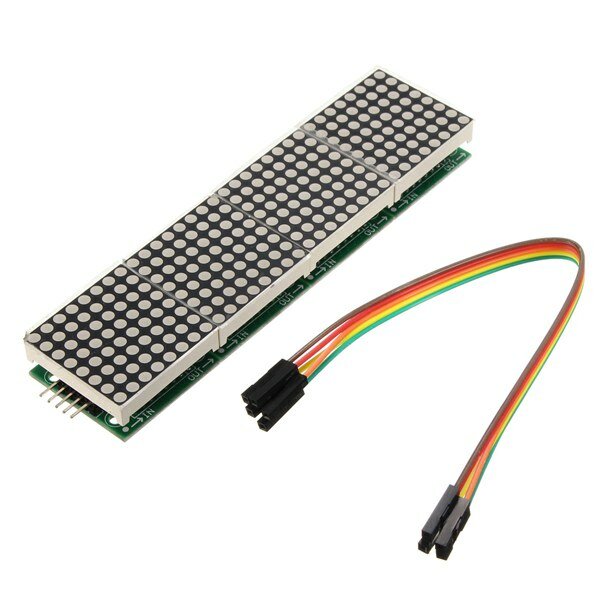
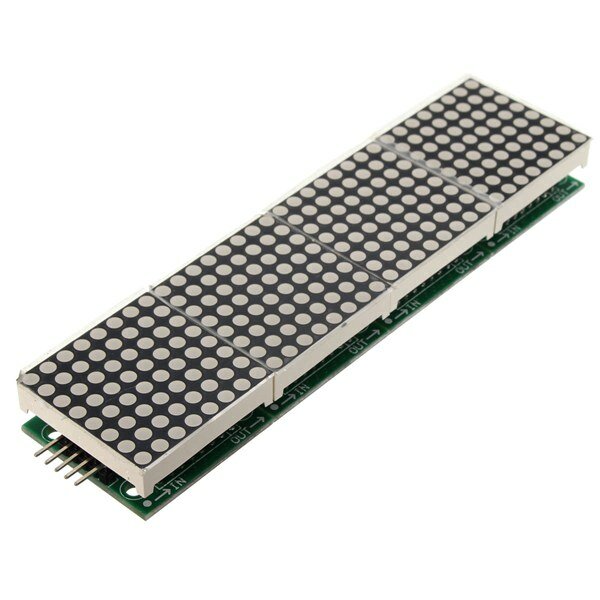
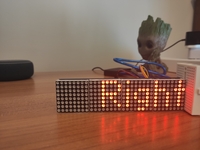
I first tried the dotMatrix on the Arduino with the Sprite and Matrix libraries. I got funny results because the column adressing is reversed.
Therefore I switched to the MD_MAX72xx libraries. Make sure to change the define in the MD_MAX72xx. h file to read:
#define USE_FC16_HW 1
I used the MD_Keyswitch library found at https://github.com/MajicDesigns/MD_KeySwitch
and the MD_MAX72xx library found at https://github.com/MajicDesigns/MD_MAX72XX
Then I pulled the source at https://github.com/MajicDesigns/MD_MAX72XX/blob/master/examples/MD_MAX72xx_ScrollChart/MD_MAX72xx_ScrollChart.ino
With that you should be able to get it to work.
If you use pins that are not-SPI standard, make sure to activate the call to MD_MAX72XX with four parameters, and comment out the one with two parameters.

very good product and good price.
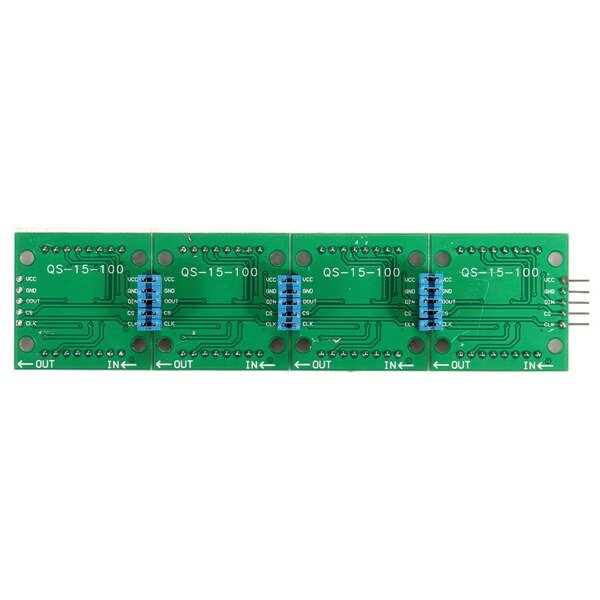
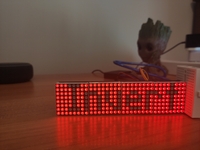
If you don't know how that work i found one good tutorial.
https://www.makerguides.com/max7219-led-dot-matrix-display-arduino-tutorial/
If you try the programs and see that they do not work with the first one.
Try changing the names of the pins you will use and reload the program on Arduino.
e.g.
CS_PIN 10
DATAPIN 11
CLK_PIN 13


Tips:For questions about your order, place of delivery, product discount, taxation, delivery time, warranty, shipping, payment, exchange rate, and other questions unrelated to the product, please contact customer service.
A part of the QA has been auto-translated.
Získajte najnovšie novinky o značkách a 15% zľavu na prvú objednávku.

Hi ?
How can we help?


